
Gimp Tips - Charcoal Drawing
I'm always looking for ways to make a photograph look like a drawing. But it's hard to do well. I saw a really nice technique for Photoshop recently. I couldn't reproduce their steps in GIMP, but it inspired me to try again on my own. Here's what I came up with.
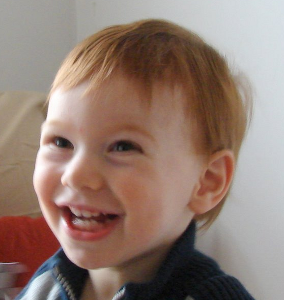 Open your picture. Of course, yours won't be as adorable as mine, but
you'll have to make do. Crop in to your subject pretty closely. We'll be
masking out the background.
Open your picture. Of course, yours won't be as adorable as mine, but
you'll have to make do. Crop in to your subject pretty closely. We'll be
masking out the background.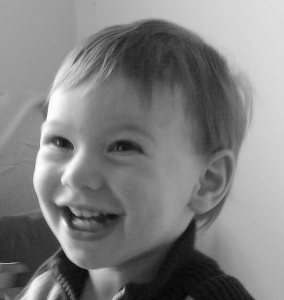 Colors|Desaturate using luminosity
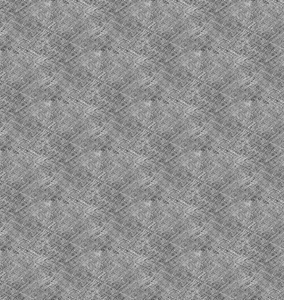 Add a new white layer and push it down below your photo. Next make another
new layer between the white layer and your photo. Fill that middle layer
with the pattern "Paper (100 x 100)".
Add a new white layer and push it down below your photo. Next make another
new layer between the white layer and your photo. Fill that middle layer
with the pattern "Paper (100 x 100)".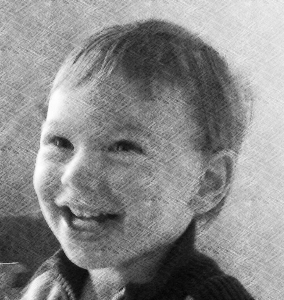 Set the mode on the photo layer to "Hard light".
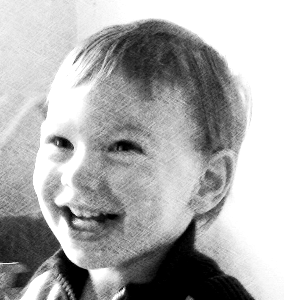 Adjust the brightness and contrast to get the look you want. I turned both
up about 50 in this case. Higher contrast gives it a more sketch-like look.
Then adjust the brightness so it doesn't look too heavy. When it looks
right, do Merge Down on the photo layer.
Adjust the brightness and contrast to get the look you want. I turned both
up about 50 in this case. Higher contrast gives it a more sketch-like look.
Then adjust the brightness so it doesn't look too heavy. When it looks
right, do Merge Down on the photo layer.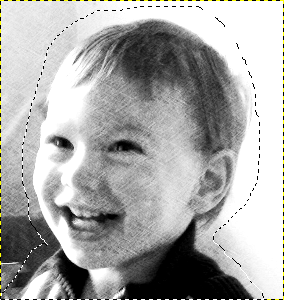 Make a selection around the subject of your picture, but leave a little
room. The selection doesn't have to be very precise, we're going to blur it
in a minute anyway.
Make a selection around the subject of your picture, but leave a little
room. The selection doesn't have to be very precise, we're going to blur it
in a minute anyway.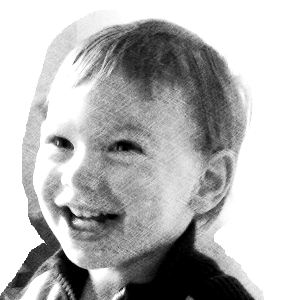 Add a layer mask to the photo layer using your selection.
Then Select|None.
Add a layer mask to the photo layer using your selection.
Then Select|None.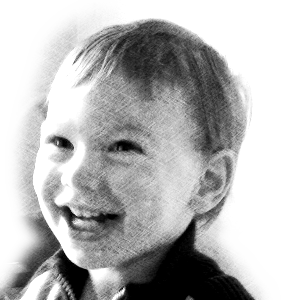 Do Filters|Blur|Gaussian Blur on the layer mask. Choose a blur radius
about equal to the distance you left around your subject when you did the
selection. I used 20 here.
Do Filters|Blur|Gaussian Blur on the layer mask. Choose a blur radius
about equal to the distance you left around your subject when you did the
selection. I used 20 here.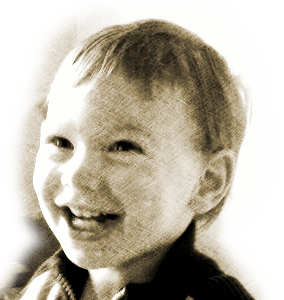 Now spruce it up a bit. I did Colors|Colorize and used hue:40 and
saturation: 25. Obviously, you can color it however you want and try
putting it on different backgrounds.
Now spruce it up a bit. I did Colors|Colorize and used hue:40 and
saturation: 25. Obviously, you can color it however you want and try
putting it on different backgrounds.